Finished Calendar

When you have finished all the pieces of your calendar:

Dates pages for each month

5 Holiday Icons

1 work of art for each month totally 12

1 cover design

You are ready to use InDesign to put together your calendar.

Follow the directions in class to put together all the pieces.

Create a back page that contains all the works of art only and your personal logo. The works of art should be 20% of the original size.

When the back page is complete, package the entire document and turn in the package to the turnstile and the pdf into canvas.


Calendar Artwork

Using either your OWN photographs or your own illustrations and Photoshop create the top artwork portion of the calendar. Including in that portion of the design the name of the each month.Screen Shot 2017-03-23 at 6.44.40 PM.png

Holiday Icons

Choose 5 Holidays. (Birthday, Fourth of July, etc.)

Make 1 document with 5 artboards.

Make one icon for each (5) Holidays that matches the style of your calendar.Screen Shot 2017-03-23 at 8.16.31 PM.png

Calendar Dates

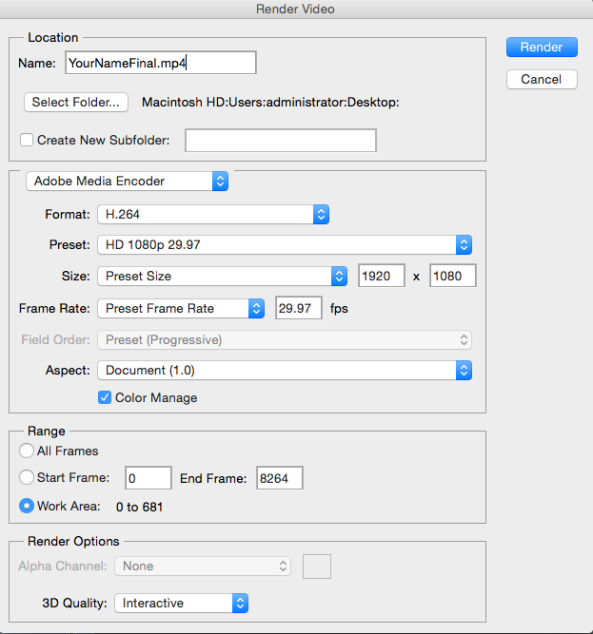
Using Illustrator set up the layout for the dates pages for each month of the year.

Screen Shot 2017-03-23 at 6.46.37 PM

When you are finished your artwork will be at the top (photograph or illustration) and the dates will be at the bottom.

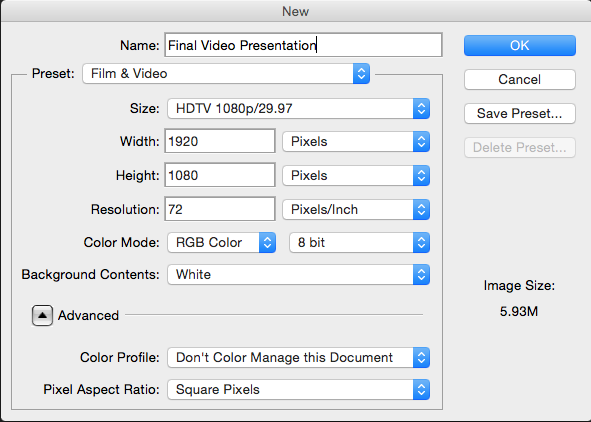
You can set up your document on Letter Size Paper that is landscape 11″ x 8.5″


Screen Shot 2017-03-23 at 6.49.39 PM.png


After your paper is set up the first step is to make boxes or circles that will represent each day. You start with 7 shapes across, that are aligned. See below:

Screen Shot 2017-03-23 at 6.55.57 PM.png


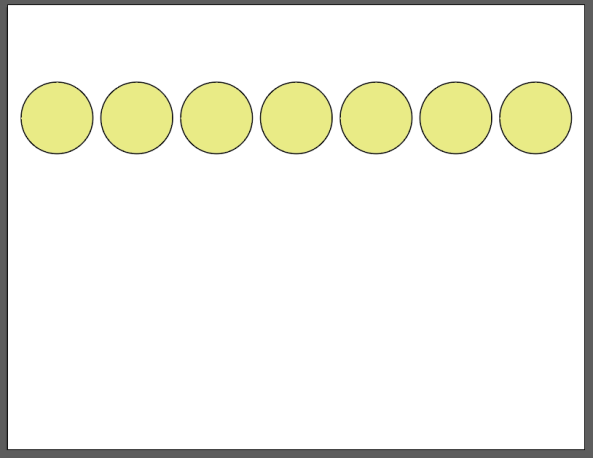
You need a total of at least 5 weeks but you could have 6.

Screen Shot 2017-03-23 at 7.22.43 PM.png


You want to lock the current layer and make a new one for the numbers

Screen Shot 2017-03-23 at 7.25.51 PM.png


Then design your numbers, you want the template for all the months to be perfect so make sure you don’t skip any numbers. Also don’t make them in one long text box, make them individual text entries. You will be moving and shifting them.

Screen Shot 2017-03-23 at 7.25.44 PM.png

Screen Shot 2017-03-23 at 7.30.41 PM.png

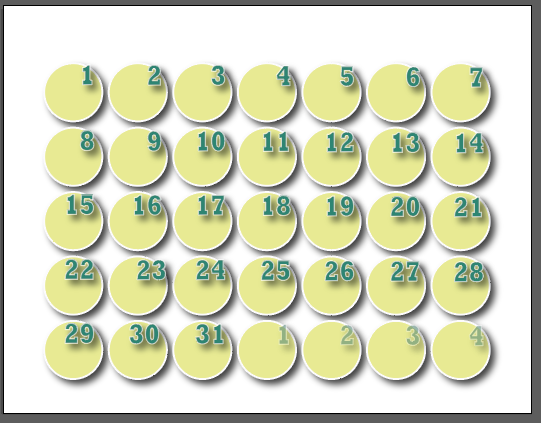
Once you have your design set up add the days of the week at the top.

Screen Shot 2017-03-23 at 7.36.31 PM.png


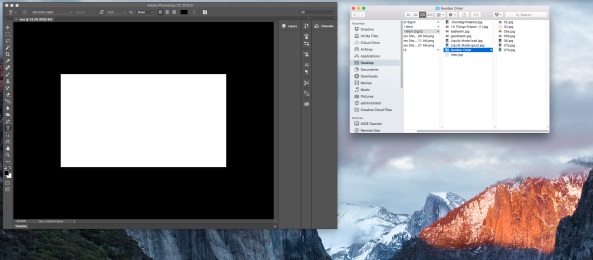
Double check that it is all correct. Now you are going to duplicate your artboards.


The artboard panel can be found under Window – artboardsScreen Shot 2017-03-23 at 7.30.56 PM.png


Double click on the word artboard1 and change it to January.Screen Shot 2017-03-23 at 7.31.09 PM.png


Make sure none of your layers are locked. While holding the option key  and using the artboard toolScreen Shot 2017-03-23 at 7.31.24 PM.png, click on January and drag a copy to make February.

Screen Shot 2017-03-23 at 7.31.53 PM.png


Now you are ready to shift numbers.

As a added time saver, use the hints below to save work and time.

Remember 30 days has September, April, June and November, all the rest have 31 except for February, it has 28.

Also the following months start on the same day of the week:

Sunday – April, July

Monday – January, October

Tuesday – May

Wednesday – August

Thursday – February, March, November

Friday – June

Saturday – September, December

So if you made January, October is all set, just duplicate it.


Fantasy World Background

The pre-school class asked for some background designs for reading time. They want us to create some fantasy worlds that can change based on the type of story.

Using photoshop create and imaginary world.Please find a minimum of 5 LARGE images from the internet, they can NOT be scary, the finished results are for small children.

The document size should be 17″ wide by 11″ height at 300 resolution in CMYK mode (we will be printing the final result).

Here are some examples of images I found below. I also downloaded some brushes from Brusheezy.com


After combining all the images and changing some layer styles and blending areas of the photos together, I came up with something like this:

FantasyWorld.jpg

Digital Art and Design 4 – Blog List

Gabe Ayers – http://beafreeghost.wordpress.com/

Manny Baez-Feliciano – http://mannybaezblog.wordpress.com/

Garrett Brooks – http://carpediemdesignssite.wordpress.com/

Adriahna Cornell – http://addiecornell.wordpress.com

Patrick Dukes – http://patrickdukes88.wordpress.com

Kenzie Fillet – http://blancciiu.wordpress.com

Alec Gibson – http://somesunset.wordpress.com

Daiquon Guy – http://daiquonguy.wordpress.com/

Nicholas Hale – http://nickhale98.wordpress.com

Justin Hurd – http://hurdworks.wordpress.com/

Daniel Lancaster – http://daniellancasterdigitalart.wordpress.com/

Nicolas Mcateer – http://nicolasmcateer.wordpress.com/

Myles McDaniel – http://mylesaustin.wordpress.com

Ivan Mora – http://www3381.wordpress.com/

Ivan Morales – http://ivanandresmorales.wordpress.com/

Tina Nguyen – http://wintina.wordpress.com

Jasmine Patterson – http://jspatterson99.wordpress.com

Timothy Patterson –

Eduardo Ramos Camacho – http://ereswey.wordpress.com/

Aleeyah Sidden – http://aleeyahsidden.wordpress.com

Jeremy Smith – http://smithcomics.wordpress.com

Drew Tutkus – http://drewtutkus1.wordpress.com

Parker Wilson – http://parkerwilson132.wordpress.com

Coleman Yeager – http://yeagmastercinema.wordpress.com/

Digital 2 Final Presentation

Design an Intro Graphic and Slogan Graphic:

1. Design an Intro graphic that includes your name on a NEW document that is

1920px x 1080px at 72 resolution by going to File->New Document

2. Use the Text tool to write your name, first and last.

3. You can add any graphics or pictures to this intro, but if your name is hard to read, points will be taken off.

4. When done creating your graphic, save it to your desktop as Intro Graphic


Present all your work IN ORDER

The list of projects in your final presentation is below. Create a folder on your desktop called FINAL WORK, save all of your final projects into this folder.

(save all your work as JPG)

Project List

  1. Intro Graphic
  2. About Me Portrait Project
  3. Robot Day
  4. Best Principle of Design Photograph
  5. Changing Teeth, Before and After
  6. Healing Brush, Before and After
  7. Liquify Before and After
  8. Changing Eye Color Before and After
  9. Changing Hair Color Before and After
  10. Retouching Final You Before and After
  11. Eye Art
  12. Photo Restoration – Antique Photo – Before and After
  13. Own Photo Restoration – Before and After
  14. Environmental Portrait
  15. Digital Landscape Painting
  16. Photo Illustration
  17. Double Exposure
  18. DVD cover Design
  19. Billboard Designs – 4
  20. Surrealistic Portrait
  21. Surrealistic Animal Face
  22. Surrealistic Hybrid Animals
  23. PhotoStory 1
  24. PhotoStory 2
  25. PhotoStory 3
  26. *Panorama
  27. Final Campaign – Logo Design
  28. Final Campaign – Design Brief (Design this page)
  29. Final Campaign – Storefront Design
  30. Final Campaign – Product
  31. Final Campaign – Magazine Ad
  32. Final Campaign – Website Homepage
  33. *T-Shirt Project


Organized 

Screen Shot 2016-12-13 at 9.40.00 AM.png

  1. Label all the files (numbers should be listed as 01,02,03,04,05,06,07,08,09,10,11 etc.)

Before Screen Shot 2016-12-13 at 9.40.11 AM.png After Screen Shot 2016-12-13 at 9.40.21 AM.png

  1. You need an MP3 of your favorite song (this must have clean lyrics, if explicit lyrics are used in your final project YOU WILL FAIL THE FINAL). If you find your song on youtube.com you can download the song using this link:

http://www.youtube-mp3.org/ (Links to an external site.)

  1. Find your song on youtube.com

Screen Shot 2016-05-12 at 10.08.52 AM.png

  1. Copy the url address (an example ishttp://www.youtube.com/watch?v=KMU0tzLwhbE) 
  2. Paste it in the box and click convert Video

Screen Shot 2016-12-13 at 11.18.55 AM.png

  1. Click Convert Video
  2. Click the Download link
    Screen Shot 2016-12-13 at 11.19.03 AM.png
  1. The MP3 file should download to your Finder – Downloads folder

Screen Shot 2016-05-12 at 10.12.58 AM.png

  1. LISTEN to the song and make sure there are NO explicit lyrics
  1. Open Adobe Photoshop – It should be on your doc but if it isn’t, go to your Finder – applications folder – Adobe Photoshop CC – Adobe Photoshop CC.app

Screen Shot 2016-05-12 at 10.13.43 AM.png

  1. Go to File –New – Choose Film & Video

Screen Shot 2016-05-12 at 9.58.50 AM.png

  1. Set the video settings to HDTV 1080p/29.97, RGB, White Background

Screen Shot 2016-05-12 at 9.59.08 AM.png

Click OK

  1. Go to the folder with your final work on it, set the program and the folder side by side so you can see both the application and the contents of your folder.Screen Shot 2016-12-13 at 9.48.24 AM.png
  2. Shift and select all of your files for your portfolio from the FINAL WORK folder.Screen Shot 2016-12-13 at 9.48.32 AM.png
  3. Drag all the files to your new document.
  4. They come in one at a time. Screen Shot 2016-12-13 at 9.48.40 AM.png
  5. Set the size of each photo on your new document, then press enter, it should bring up the second file.

Screen Shot 2016-12-13 at 9.51.06 AM.png

They will overlapp, that is OK

Repeat the process until all of your files are on the new document.

You should have a layer for each image. (You will have way more than I have shown below)

Screen Shot 2016-12-13 at 9.52.22 AM.png

  1. Go Layer by Layer and Make sure they are in the right place

20. Go to Window – Timeline

Screen Shot 2015-12-07 at 3.02.44 PM.png

21.Click on the middle of the button “Create Video Timeline”Screen Shot 2015-12-07 at 3.03.24 PM.png

——–If it does not say Create Video Timeline, hit the down arrow on the right of Create Frame Animation and choose Create Video Timeline.

It should look like this but with many more layers

Screen Shot 2016-12-13 at 9.53.53 AM.png

22. Each Layer or Slide should last for about 2:00f which is 2 seconds.

——You Can Zoom in and out of your timeline using the little slider on the bottom left Screen Shot 2015-12-16 at 10.11.00 AM.png

There is no fast way to do this, you need to grab the right edge of the purple rectangle and drag it left. Screen Shot 2016-12-13 at 9.54.16 AM.png

23. All of the video layers must be set to 2:00f

Screen Shot 2016-12-13 at 9.54.32 AM.png

Once you have done this you need to stagger each video layer by dragging the purple box to look like stairs. Remember the first one should be your graphic intro page so that should be at the bottom of the stack and showing first.

Screen Shot 2016-12-13 at 9.54.59 AM.png

– Do Not add Transitions!!!!

Screen Shot 2015-12-07 at 3.06.35 PM.png

To Add Music in the bottom left of the video timeline there is an audio track.

Screen Shot 2016-12-13 at 10.00.40 AM.png

Click the music note drop down arrow.Screen Shot 2016-12-13 at 10.00.44 AM.png

Choose Add Audio –

Navigate to your .mp3 downloaded file. It should look something like this:

Screen Shot 2016-12-13 at 10.03.10 AM.png

25. Go to File – Export – Render Video

Screen Shot 2015-12-07 at 3.06.59 PM.png

26. When you are finished with your project upload the finished .mp4 to canvas for presentation

Final Presentation